Your First Bot on VOIDX
This guide walks you through the current VOIDX flow: browse → connect → add API keys → deploy from the Marketplace. By the end, you’ll have a bot running on your own exchange account.What you’ll need:
- A wallet — Sui, Solana, or EVM (MetaMask, Phantom, Sui Wallet, etc.)
- An exchange account — BloFin, Bybit, HTX, WEEX, or DEFX
- Trading capital in your exchange futures wallet ($500+ recommended)
Step 1: Browse Without Connecting (0 minutes setup)
Go to voidx.trade and click Launch App. You don’t need a wallet or an account to look around. As a guest you can:- Open the Marketplace tab and browse all preset bots
- Click any card to see its full detail view — strategy explanation, stat tiles, exchange variants
- Check the Markets tab for market data
- Read strategy descriptions before risking anything
Step 2: Connect Your Wallet (2 minutes)
1
Click Connect Wallet
In the top bar, click Connect Wallet and choose your chain: Sui, Solana, or EVM (BSC, Base, Ethereum).
2
Approve the connection
Your wallet extension will prompt you — click Approve.
3
Sign the authentication message
Sign the message to verify wallet ownership. This is a signature only — no transaction, no gas, nothing leaves your wallet.
No PUMPKIN needed for the Free tier. Connecting a wallet gives you Free tier access: 1 bot, 1 symbol, 1 exchange. Pro (5 bots, 10 symbols, 5 exchanges) is available via a 14-day trial. See PUMPKIN Token.
Step 3: Add Exchange API Keys (5 minutes)
3.1 Create API Keys on Your Exchange
- BloFin
- Bybit
- HTX
- WEEX
- Log in to BloFin
- Go to Account → API Management
- Create new API key with:
- Read
- Trade
- Withdraw (NEVER enable!)
- Set a passphrase
- Copy: API Key, Secret, Password
3.2 Add Keys to VOIDX
1
Open Add Exchange
On the Overview tab, the Quick Start panel shows an Add Exchange button once your wallet is connected.
2
Enter credentials
- Select your exchange
- Paste API Key and Secret
- Enter Password/Passphrase (BloFin and WEEX require it; BloFin’s broker ID is filled in automatically)
3
Test the connection
Use Test to confirm the keys work before relying on them.
Step 4: Deploy a Bot from the Marketplace (5 minutes)
1
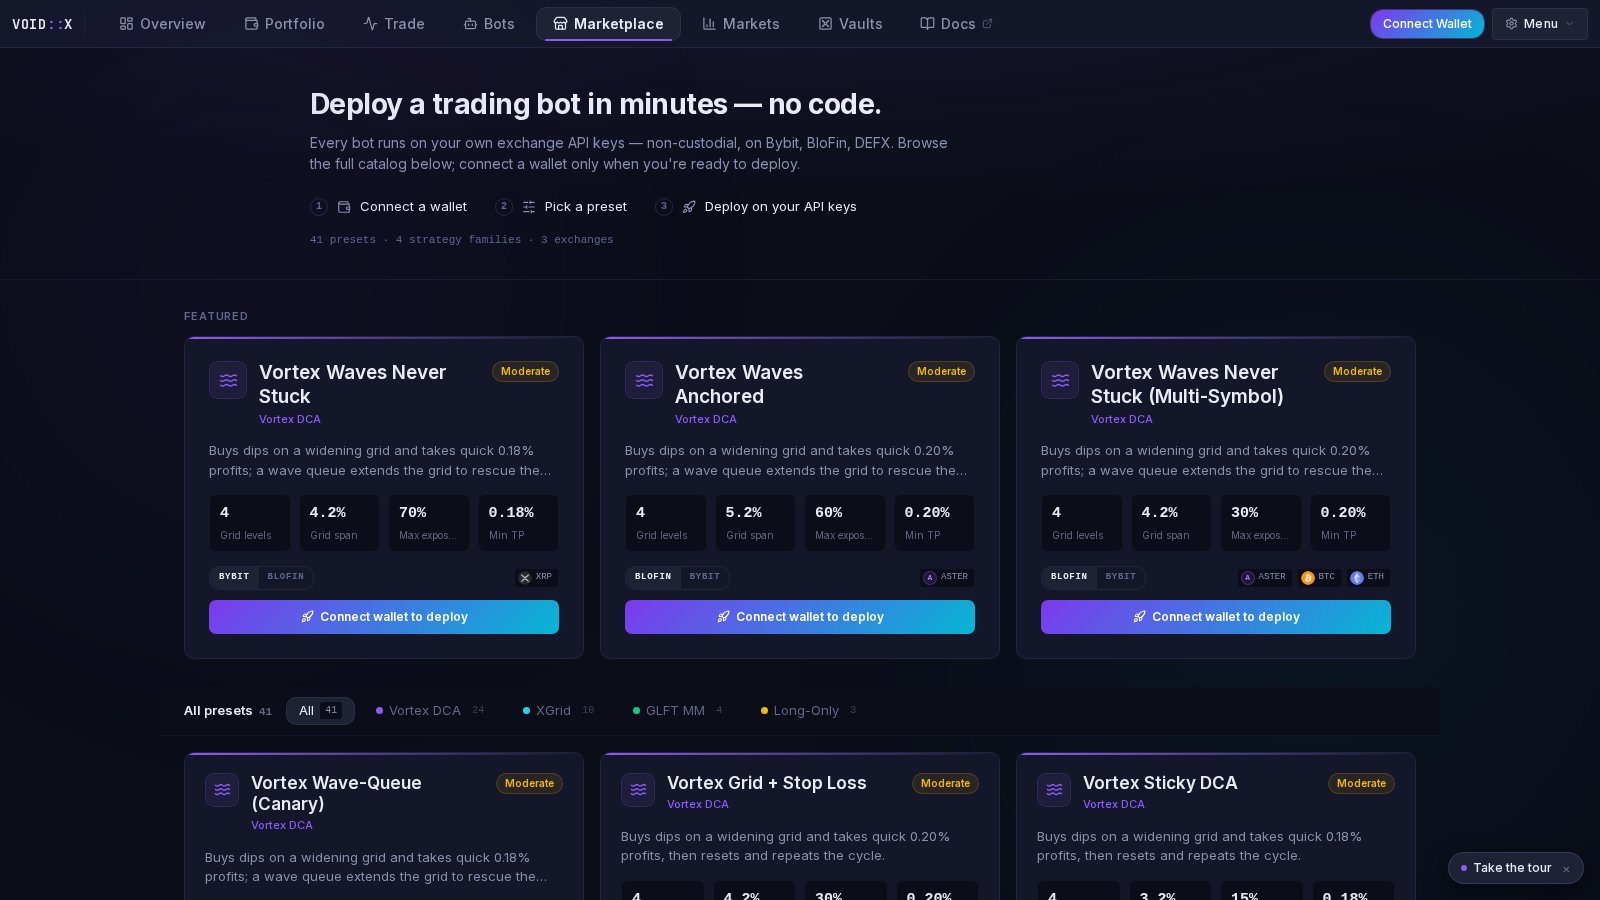
Open the Marketplace tab
You’ll see 41 preset cards across 4 strategy families: Vortex DCA, XGrid, GLFT MM, and Long-Only DCA. Filter by family using the chips at the top.
2
Pick a preset
Each card shows a plain-English description, a risk label (Conservative / Moderate / Aggressive), and stat tiles read from the preset’s actual configuration. Beginners: start with a Conservative preset.
3
Open the detail view
Click the card to see the full breakdown of how the strategy behaves and what each stat means.
4
Choose your exchange variant
If a preset is available on multiple exchanges (Bybit, BloFin, DEFX), toggle to the exchange you added keys for.
5
Click Deploy
The deploy wizard opens prefilled with the preset’s settings. Review them, pick your symbol, and confirm.
Step 5: Verify It’s Working (5 minutes)
Check These Indicators
Status is green — the bot is running without errors (Bots tab)
Orders visible — open orders appear on your exchange and in the terminal
Logs updating — the bot’s log stream shows activity
Portfolio filling in — the equity curve on the Portfolio tab starts recording
What to Expect
First few minutes:- Bot analyzes market conditions
- Places initial orders
- You’ll see orders in the terminal and on your exchange
- Some orders may fill, depending on market movement
- A position may open and P&L starts tracking
- Multiple fills are likely in normal conditions
- Positions grow and shrink as the strategy works
What’s Next?
Understand Strategies
Learn how each strategy family works
Customize Settings
Adjust parameters for your style
Risk Management
Protect your capital
On-Chain DEX
Trade on-chain on Sui via DeepBook
Common First-Timer Questions
How long before I see profits?
How long before I see profits?
It depends on market conditions. In active markets, you might see fills within hours. In quiet markets, it might take longer.Don’t expect: Instant profits
Do expect: Activity within 24 hours in normal conditions
What if my position goes negative?
What if my position goes negative?
This is normal! DCA-style strategies are designed to average into positions and recover.
- Small unrealized losses are expected
- The system has recovery mechanisms
- Only worry at large drawdowns
Should I watch it constantly?
Should I watch it constantly?
First week: Check daily to understand behavior
After learning: Weekly checks are usually fine
Exception: Highly volatile markets — check more often
When should I stop the bot?
When should I stop the bot?
Consider stopping when:
- You want to take profits
- Market conditions are extreme
- You don’t understand what’s happening
- You’re approaching loss limits
Need Help?
FAQ
Common questions answered
Telegram Support
Get help from the community